A Beginner’s Tutorial on Setting Minimum Bids to Guarantee Revenue
Why minimum bids matter more than you think
Imagine launching an online auction for a limited-edition product. Dozens of bidders flock to your page, the price climbs in small steps…and when the dust settles, the winning bid barely covers your manufacturing costs. An auction without a floor price is a gamble; sometimes you hit the jackpot, but just as often you leave money on the table.
Minimum bids (also called reserve prices or starting bids, depending on the context) remove that uncertainty. By defining the lowest acceptable price before the first bid is placed, you guarantee that revenue will meet or exceed a threshold you are happy with—even in slower markets or off-season drops.
In this beginner-friendly tutorial we will cover:
A plain-English definition of every pricing term you’ll run into
A simple, data-driven framework to calculate the optimal minimum bid
Step-by-step instructions for configuring minimum bids in the Rankbid dashboard and API
Common pitfalls (and how to avoid them)
Pro tips to squeeze even more revenue out of every auction without scaring bidders away
Whether you run a charity fundraiser, a collectible release, or programmatic ad space, setting the right floor price is the fastest way to protect your margins.
1. Minimum bid, starting bid, reserve price: what’s the difference?
These three terms are often used interchangeably, but they affect bidder psychology in slightly different ways.
Starting bid: The opening amount displayed to all bidders. Once someone places that first bid, the auction is underway. If you label an item at $1, people may jump in out of curiosity—even if you secretly hope the price will reach $500.
Reserve price: A hidden floor that must be met for the item to sell. Bidders can push the price upward from a low starting point, but if the final amount doesn’t reach your reserve, the auction ends with “item not sold.” This tactic builds excitement yet shields your bottom line.
Minimum bid (hard floor): A public, non-negotiable minimum. Unlike a reserve, it is visible. Anyone who wants to participate must bid at least this amount. It reduces low-ball noise and signals a premium product.
On Rankbid you can mix and match these controls. For example, you might show a $100 starting bid with a $350 reserve in a second-price format. We’ll show you how later in the article.
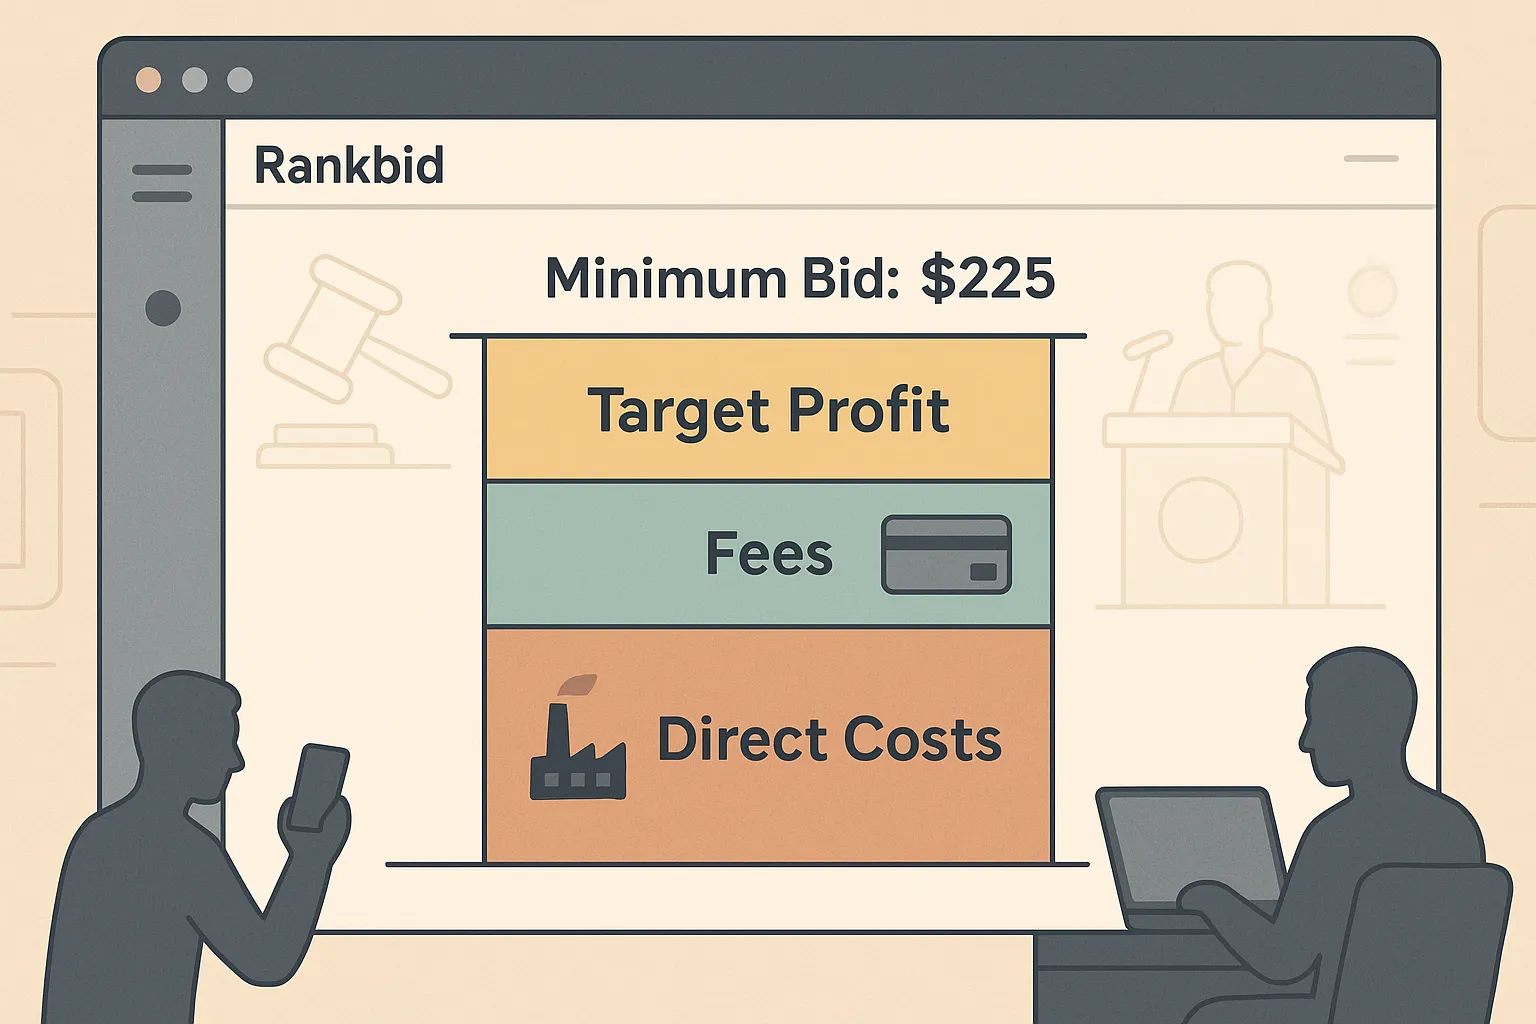
2. How to calculate the perfect floor price
“Hoping for the best” is not a strategy. Use a simple cost-plus model instead:
Where:
Direct Costs: Manufacturing, licensing, logistics—anything that scales with the item.
Platform & Payment Fees: Rankbid’s transaction percentage (see our Fee Breakdown) plus Stripe processing.
Target Profit: The absolute dollar amount you want to earn.
Buffer: A small percentage (5–10 %) to absorb unforeseen charges or returns.
Example
You’re auctioning a custom keyboard that costs you $140 to produce and ship. You’re on the Business plan (3.9 % Rankbid fee) and expect a 2.9 % Stripe fee.
Setting the floor at $225 ensures you pocket roughly $60 even if a single bidder shows up. If you prefer a public floor, make $225 your starting bid. Alternatively, display a lower starting bid (e.g., $100) but set a hidden reserve at $225 to encourage early action without financial risk.
3. Setting minimum bids in the Rankbid dashboard
Rankbid was built for self-service auctions, so everything can be configured in a couple of clicks—no spreadsheets or SQL required.
Log in and create an auction
Click New Auction in the top-right corner.
Enter basic details
Title, description, start & end dates.
Open the Pricing tab
Here you’ll see three fields:
Starting Bid
Reserve Price (optional)
Bid Increment
Input your floor
For a public floor: set Starting Bid to your calculated amount.
For a hidden reserve: choose a lower starting bid, then enter the reserve.
Adjust bid increments
Typical increments are 1–3 % of your starting bid. A $200 item might move in $5 steps.
Save & publish
Rankbid validates the numbers and alerts you if the reserve is lower than the starting bid, or increments are illogical.
That’s it—no coding, no manual timers. Rankbid automatically enforces your floor; if the highest bid at closing is below the reserve, payment is never captured, and you keep full control of the item.
4. Doing the same via the API (developers, this one’s for you)
Many businesses use Rankbid’s API to spin up thousands of auctions programmatically. Below is a minimal example in cURL:
The response includes an auction_id you can surface in your storefront. Full API docs live in your dashboard under Developers → API Reference.
Tip: Use webhooks to be notified when the reserve is met so you can trigger in-stock updates automatically.
5. Five mistakes that erode revenue (and how to avoid them)
Setting the floor based on emotion, not mathAlways calculate costs, fees, and profits—guessing leads to thin margins.
Ignoring transaction feesThat 7.9 % fee on the Free plan is significant. Revisit your floor price whenever you switch plans. (See all fees)
Making increments too small$1 steps on a $1,000 item create bidding fatigue. Keep increments proportional.
Hiding the reserve in the wrong marketCollectors may enjoy the mystery; corporate procurement departments won’t. Test visible vs. hidden floors with A/B auctions.
Forgetting to promote the auctionA perfect minimum bid means nothing if nobody sees the listing. Schedule email and social pushes while creating the auction so you don’t forget later.
6. Advanced levers to boost final prices
Auto-extend closing timeEnable Rankbid’s “anti-sniping” toggle: if a bid arrives in the last minute, the auction extends by 60 seconds. This keeps momentum high.
Second-price format above the reserveCombine a reserve with a second-price mechanism to encourage truthful bidding. New to second-price auctions? Read our primer on First vs. Second Price.
Installment payment optionsOn the Enterprise plan you can allow winners to split large payments through Stripe’s Affirm integration, widening your bidder pool.
Dynamic increment scalingStart with small steps, then auto-increase increments once the bid crosses certain thresholds. Fewer clicks, higher velocity.
7. Frequently asked questions
Will bidders be charged if the reserve is not met?No. Rankbid’s payment flow uses a pre-authorization through Stripe. Funds are only captured when the final bid equals or exceeds your reserve. Learn more in When will I be charged for a bid?
Can I change the minimum bid after the auction starts?For transparency reasons, Rankbid locks the floor once the first bid is placed. If you need to lower it, cancel and relist.
What happens if no one bids at or above my minimum?The auction ends with “unsold.” You can relist the item, adjust the floor, or convert it to a fixed-price offer.
Is there an extra fee for setting a reserve?No. Reserve functionality is included in every plan.
Does a high minimum scare off bidders?Sometimes. Monitor the bidder count in real time. If interest is low across multiple listings, consider lowering the floor or making it hidden.
8. Key takeaways
Minimum bids protect your margins and forecastable revenue.
Calculate the floor with a cost-plus formula—never guess.
Rankbid lets you enforce public floors or hidden reserves in seconds, either in the UI or via API.
Keep bid increments logical and always factor in platform + payment fees.
Test, measure, and iterate; today’s perfect floor may be tomorrow’s missed opportunity.
With a solid minimum bid strategy, every auction starts at a price you can live with—and often ends much higher. Log in to Rankbid, set your next floor, and guarantee your revenue today.